7.29.2010

Personalized Wreath

Every year, my family has a huge reunion and we always do an auction to raise money for the next reunion. I never usually contribute much but since I have turned over a new leaf in the creativity department, I decided to try something new. I found the idea for this personalized wreath at a blog called Lil' Luna... see the tutorial HERE. I personally think hers was much cuter than mine but oh well, I'm an amateur. :)

(PS- my camera flash made it look like there are scratches on the letter but that was just the texture.)
You will need:
A wreath
A cardboard or wood letter (found at most craft stores)
Modpodge
Craft Paint
1 sheet of scrapbook paper
Ribbon


Start by painting the sides of the letter and a little on the top so it doesn't show through the paper.

Put one coat of mod podge on the wood and then lay the traced paper letter on that.

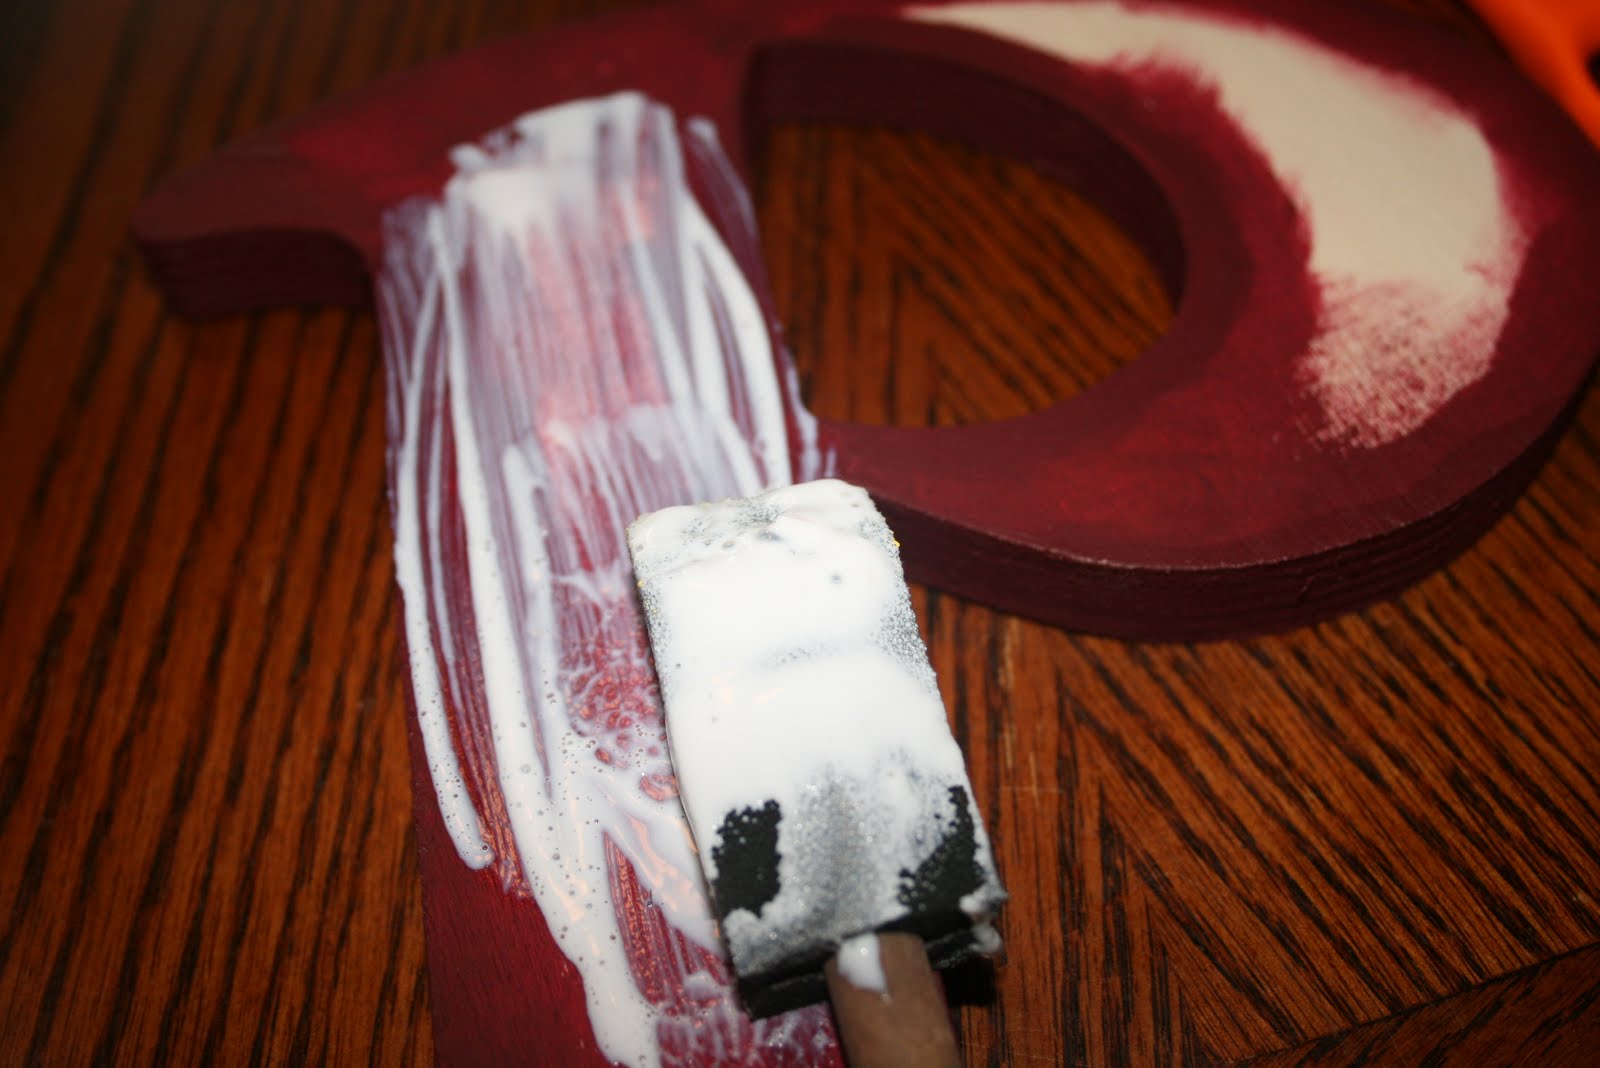
Mod podge the top of the scrapbook paper. Once dried, turn it over and use an exacto knife to cut any excess paper off the sides. I sanded the sides of mine a little to make it look aged.

Finally, tie the letter to the wreath using whatever ribbon you can find that matches. In the tutorial, she gets a little more creative with hanging her letter. She also added a really cute little family message but that style looked better with her larger M than it did with my little P.

Ta Da! One beautiful and inexpensive wreath. I used the letter P because most of my family has a last name starting with that letter. After the reunion, I will update everyone on how much it sold for. I am really excited to see who buys it!

7.22.2010

Vinyl Record Bowls

So I saw these cool bowls for sale at a farmer's market a few years ago and wondered how they did that. A quick google search and I found plenty of tutorials on how to make these funky bowls using old records. I used a tutorial from Homemade Mamas. I really like their blog because most of the projects use things found around the house. Check out the tutorial I used HERE... I slightly adapted their instructions below.


Start with:
1 vinyl record (you can buy them way cheap at second hand stores)
2 oven safe bowls (one slightly larger than the first)
1 cookie sheet
A hot pad for handling

Set it up so it looks like the picture above. Place the smaller bowl (9 inch) upside down on the cookie sheet. Put the record on top of that. Place this in a 225 degree oven for about 10 minutes. They advise opening a window because of fumes. I didn't notice any fumes when I did it but err on the side of caution and open a window.

Place your other larger bowl on the table. You will use it later.

When the record comes out of the oven, it should look like this.

Working quickly and using an oven mit, grab the record and place it over the top of the larger bowl. Press it down into the bowl and work with it until it makes the shape you want.

Mine looked like this. The first time I made one, it took me a few tries of putting it back in the oven to warm it up and shape it again. If you get the record warm enough, you can quickly put it in the bowl and shape it the way you want the first time. If it's not warm and pliable enough, it will be harder.

At first, I didn't think these bowls really fit my style but after making them myself, I really like them. You can paint them, store your jewelry or knick knacks, plant little flowers, or hang them on your wall for a funky decoration. On Etsy they sell them painted for over 50$! I am glad I got mine for practically free. :)

7.20.2010

Diaper Cake

I saw this idea at a baby shower many years ago and have added my own twist on making my own diaper cake. These can be very elaborate or very simple. This diaper cake was made for a little boy, I find that it is easier to go all out on trinkets and additions with girls.

First I take one diaper (size 1 or newborn) and I roll it up and tape it (scotch tape is easiest). One bag of 50 diapers is sufficient for a whole cake.
Next I take another diaper and wrap it around the first diaper and tape it. I continue to roll diapers and tape them to the previous diaper until I have the roll size I like. The bottom layer I use about 25 diapers, the middle 18, and for the top I use 7. I've tried more even numbers but this seems to be the best combination. (I am a little obsessive compulsive about the numbers being 25, 15, and 10 but it just doesn't work as well). After I have rolled all my cakes I take 3 different materials that I've purchased at the store (Joannes and walmart sell small quilt squares for about 1.00(Wal-mart)-3.00(Joannes)$. Joannes has a greater selection. I take the top layer first and wrap the material over the diapers and pin it at the bottom with my finger and then glue with a hot glue gun. It is a bit tricky and I've burned myself every time I've made a cake. I pull the material several times and glue it until I get it looking the way I desire.
For a final touch on the layer I put a fat ribbon around it. (Usually this color coordinates with my fabric)
Continue this step with the other two layers. After the cake is complete I stack it just the way I like it and add extra fun stuff for the baby. (Additions for the mother are also a good idea.)

The last cake I made was for a little girl and I included a play cell phone and play jewelery-very fun!

After everything is added I take cellophane and wrap the cake and tie it with the same ribbon I used to tie around each cake layer.


7.12.2010

Antique Pictures


I made my first antique picture at a work party I had--the idea came from one of the ladies I work with. It's a really fun idea that can turn an ordinary picture into a unique antique.


What you'll need:
Canvas panels- lots of different sizes at most craft stores, my boards are 8 X 10
Modge podge- the regular stuff works best
Sponge brush- i notice the wider the better
A picture printed on normal printing paper-not on photo paper
An old credit card or hotel key
Razor blade or sharp knife

Start by painting a thick layer of modge podge on your canvas board. This will be your glue holding your paper to your board.


Even out the modge podge by running your brush once over the entire board. Place your picture on top of the board. **Make sure it's even the first time because you will have more bubbles if you pull the picture off and try to stick it back on and because we will be cutting off some of the edges.**


Smooth out your paper with a plastic card of some type. BE CAREFUL NOT TO RUB/PRESS TOO HARD BECAUSE IT MAY RIP THE PAPER OR PEEL OFF SOME OF THE COLOR.


Paint a couple layers of modge podge across the top of your paper. This will also help it stick and it creates that antiqued look. The more modge podge you put on top, the glossier your picture will be.

Let your picture dry for at least 24 hours.


After 24 hours, place your picture face down on a cutting mat. Using a razor blade, cut around the outside of your picture. The dried modge podge will be kind of hard to cut through so you have to press kind of hard.


Now to display your picture I thought of a couple options. You could hang it from ribbon, find a picture frame or you could use an unfinished frame glued to the back. If you think of any other fun options, please let me know.

7.09.2010

Rhubarb Jam

We started canning/bottling at our house and I usually try to try something new each year. This year I got a hold of A LOT of rhubarb and was shared this recipe.


Rhubarb Jam
From: Lorraine Stephens

8 Cups Rhubarb Chopped
7 Cups Sugar
             Bring that to a boil & Boil it for 10 Minutes.
Add a 20 ounce can of Crushed Pineapple
             Boil for another 7 minutes
Remove from heat and add 1 large box of jello (I used raspberry).
Stir well until dissolved. Ladle carefully (it is hot and will burn you) into hot jars. Put on your flat and rings and set upside down on heat safe surface until cool.

This was actually the first time I have made jam without water-bath canning the jars. I had heard of canning this way, but had never tried it. As far as I can tell all of my jars sealed and they look great.

7.08.2010

4th of July pastry


My husband's family had a little 4th of July barbecue over the weekend and I was told to bring dessert. I started looking through some cookbooks and ironically enough, this is the first dessert I looked at. It was really easy to make and looked beautiful, perfect for a summer barbecue. This recipe is called Berries 'N Stars and it is in the Pampered Chef stoneware inspirations cookbook.


Ingredients:

1 package (17.25 ounces) frozen puff pasty sheets, thawed (you can find these by the pie crusts and whipped cream in the freezer section)
2 lemons or I just used 1/4 cup lemon juice

1 can (14 ounces) sweetened condensed milk

1 container (8 ounces) frozen whipped topping, thawed

1 quart or about 3 cups sliced strawberries

1 cup blueberries

Powdered sugar

1) First make sure you thaw your pastry sheets, it takes about 40 minutes. They are easier to work with when they are cold, but obviously not still frozen. Preheat your oven to 400 degrees. Take one pastry sheet and roll it out on a floured surface to be a 13X10 rectangle. Put the pastry on one side of the baking stone. Take the other pastry sheet and roll it out to be a 13X10 rectangle as well. Cut four 1 inch strips lengthwise from this sheet. Reserve the rest of the dough for decorations. Brush the outer edges of the pastry on the baking sheet with water. Arrange and press strips around edges of pastry, forming an even border. It will look like a picture frame. Prick the entire bottom of pastry with fork. Cut 16 stars from the remaining pastry dough using a small star cookie cutter. Arrange the stars along the side of the baking stone next to the pastry. Now bake for 15-18 minutes or until golden brown.

2) Juice your lemons or just put 1/4 cup of lemon juice in a medium bowl. Whisk in the can of sweetened condensed milk. When mixed, gently fold in the whipped topping until all combined. Put about 1 1/2 cups of this mixture in a decorative bag with tip to make the swirls on top if you want.
3) Fill cooled pastry within border with remaining filling. Slice the strawberries and arrange them over the filling. Arrange blueberries on top of that. Garnish with rosettes using filling in your decorative bag. Arrange the pastry stars on top. Refrigerate until ready to serve and then lightly sprinkly powdered sugar on top before serving. Serves 16.

That's it! The dessert was delicious and it got tons of compliments at the barbecue. Sorry I didn't post this BEFORE 4th of July but I think it would be great any time of the year. Enjoy!

This is a picture of the pastry covered in powdered sugar... yum.